
3D Scanning Basics: Everything You Want To Know about 3D Scanning Markers
May 28, 2025
Chapters
What are 3D scanning markers?

3D scanning markers—also known as reference dots or targets—are small, typically circular stickers placed directly on the object or within the scanning area surrounding the object. They serve as positioning aids. They help the 3D scanner have better tracking and capture more accurate and reliable data than without them. These markers are removable once the scanning process is complete.

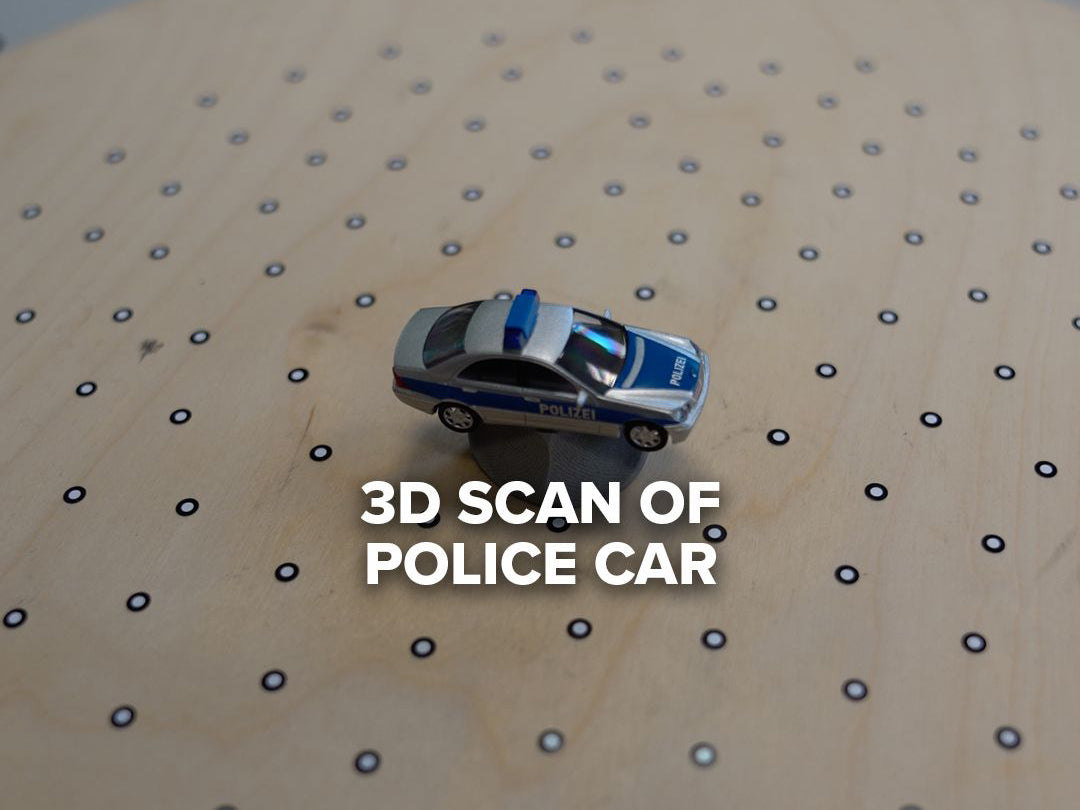

Positioning reference points for scanning large objects—like yachts, vehicles, or industrial machine parts—can be time-consuming and labor-intensive if you have to stick one dot at a time. AESUB now offers rolls of adhesive dots that make it quick and easy to place and remove markers on large surfaces.
What are 3D scanning markers used for?
While 3D scanners are typically very effective at capturing detailed geometry, they can struggle with certain surfaces—particularly those that are featureless, highly symmetrical, reflective, or very dark. To address these challenges, 3D scanning aids like markers (as well as 3D scanning sprays, which we’ll discuss later) can significantly improve scanning accuracy. These tools enhance the scanner's ability to detect surface features and spatial orientation, leading to more reliable and precise 3D data capture. Ultimately, they help make the scanning process more efficient and improve the overall accuracy of the resulting 3D model.
The key functions of 3D scanning markers:
- Tracking Movement: Markers give the scanner fixed reference points, which help it understand position and orientation— especially during handheld scanning, or when scanning large or symmetrical objects. It helps with 3D scanning over longer distances or larger objects, as the 3D scanner may lose track of its position if there aren’t enough natural features to lock onto. It allows the 3D scanning software to accurately align multiple scans.
- Improving Accuracy: Especially on featureless, smooth, or symmetrical surfaces where the scanner might otherwise lose track. Markers allow the 3D scanning software to align the scans more precisely by using consistent reference points.
Why Do 3D Laser Scanners Often Rely More on Markers Than Structured-Light 3D Scanners?
3D laser scanners are often used in handheld or dynamic setups, where the scanner moves around the object. In these cases, markers act like reference points, helping the scanner track its position and ensure that all parts of the scan—like the top and bottom—line up correctly. This is especially helpful when scanning smooth, shiny, or symmetrical objects that don’t have distinct features.
In contrast, structured-light scanners project a visible pattern onto the object and analyze how that pattern deforms across the surface to reconstruct 3D geometry. This projected texture provides a built-in means of detecting surface features, making it easier for the system to align scans without external markers.
While both systems can benefit from markers in certain conditions, laser-based scanners generally depend on them more to ensure accurate data capture and alignment across varied scanning scenarios.
In summary, markers help overcome surface and tracking issues, ensuring more accurate and complete 3D models, while making the scanning process faster and easier.
What objects do I need to use 3D scanning markers?

Using 3D scanning markers is highly recommended for the following objects or surfaces:
Featureless or Smooth Surfaces
- Examples: Car body panels, plastic molds, metal casings
- Why? The scanner needs reference points to track movement and align data.
Large Objects
- Examples: Yachts, vehicles, industrial machines
- Why? Markers help maintain tracking over long distances and large surface areas.
Repetitive or Symmetrical Geometry
- Examples: Gears, pipes, turbine blades
- Why? Prevents the 3D scanner from getting “confused” by identical patterns.
Applications that Require High-Accuracy Scans
- Examples: Aerospace components, tooling, quality control parts
- Why? Markers enhance accuracy and reduce stitching errors.
Objects Being Scanned in Multiple Segments
- Examples: Anything that requires repositioning or multiple scan passes
- Why? Markers help align different scans into one cohesive model.
If I use markers for 3D scanning, do they stay in the scan?
Yes, 3D scanning markers will show up in the scan data, but you can remove them.
While the markers appear in raw scans, most scanning software automatically detects and removes them from the final mesh or point cloud during post-processing. If not automatically removed, you can easily clean them up manually in post-processing software.
Tips on how to place markers for optimizing 3D scanning accuracy?
Our partner at AESUB came up with this comprehensive guide to help you get the best results when using 3D scanning markers: How to Optimize Marker Placement for Accurate 3D Scanning (source: AESUB LinkedIn page).
According to AESUB’s team, proper marker placement is essential for achieving high-accuracy 3D scans—especially when using blue laser mode or infrared marker stitching. Incorrect placement can lead to stitching errors, misalignment, and data loss—all of which reduce scan quality.


-
Preparing the Surface and Applying Markers
Before you start 3D scanning, markers should be placed securely on the object or the object’s surrounding surface. The sticker should remain flat for the entire duration of the scanning project. Proper placement ensures accurate tracking and alignment, leading to a smooth and efficient data capturing process. Each frame should share 3 to 6 common markers to ensure proper stitching of scans.
-
Avoiding Regular Patterns for Improved Accuracy
A frequent error in marker placement is arranging them in uniform patterns. Although this might appear organized, it can create identical reference points that confuse the scanner, potentially leading to data misinterpretation and stitching errors.
How to Avoid This Common Mistake:
- Place markers in a random, non-repetitive layout to avoid recognizable patterns
- Distribute them evenly across the entire surface
- Ensure consistent spacing, avoiding clusters or placing markers too close together
-
Where Best to Place Markers
Apply markers to flat or slightly curved surfaces. Stable positioning and accurate tracking make sure you are set up for success to get the best 3D scanning results.
Try to avoid placing markers on:
- Holes or engravings: They need to remain unobstructed for accurate scanning.
- Sharp edges or right angles: Markers placed here may move accidentally, causing misalignment of scans.
- Highly flexible or uneven surfaces – Uneven application can lead to inaccurate tracking.
You can download AESUB's guide and keep it for your reference, courtesy of AESUB.
Can I use 3D scanning sprays and 3D markers at the same time?

Yes, you can pair 3D scanning markers and 3D scanning sprays at the same time. They serve different purposes but these two aids can help you optimize your 3D scanning results.
-

3D Scanning Sprays
(also known as matte sprays or developer sprays)
Solves: Scan reliability on challenging surfaces
Reflective, transparent, or dark materials can be challenging for an optical 3D scanner to capture data by disrupting the light. For example, when the projected light source of a 3D scanner passes through a clear object, it makes it difficult for a 3D scanner to capture the surface of the object. Matte spray applies a uniform, non-reflective coating that enhances light detection and ensures accurate 3D scan acquisition.
-

3D Scanning Markers
(also known as reference dots or targets)
Solves: Scan accuracy
3D scanning markers provide the 3D scanner with consistent positioning and orientation. This results in higher overall scan accuracy, reduced stitching errors to produce cleaner, more reliable 3D mesh data.
Where can I buy 3D scanning markers?
There are several options available for 3D scanning markers. You can purchase them from our GoMeasure3D Shop, which offers a variety of 3D scanning accessories. As an official reseller of AESUB products, we carry AESUB dots along with a good selection of 3D scanning consumable to support you in getting optimal scans from your 3D scanning equipment.
Different Types of AESUB dots

Here’s a quick guide:
| Black & White AESUB dots for Structured-Light 3D Scanners | Retro Reflective AESUB dots for Laser Light 3D Scanners | ||
|---|---|---|---|
| Circular markers with contrasting black and white patterns | These markers are made from materials that reflect light back to its source, enhancing their visibility to laser-based scanners. | ||
|
Permanent Strong Adhesive
|
Permanent Strong Adhesive
|
Easy Removable Light Adhesive
|
Infinity Light Adhesive on a Clear Strip
|

Why Buy AESUB 3D scanning accessories?
- Innovation-Driven: AESUB is a pioneer in 3D scanning accessories, known for its revolutionary vanishing scanning spray—no cleanup required.
- Trusted by Professionals: Used by leading engineers, metrology experts, and 3D scanning professionals around the world.
- High-Quality Materials: AESUB products are developed to optimize scan accuracy without damaging surfaces or leaving residue.
- Full Ecosystem: From sprays to markers and accessories, AESUB offers a complete solution tailored to various scanning technologies and environments.
- Expert Support: Backed by deep industry knowledge and responsive customer service.
Got Questions?
If you have any questions about 3D scanning markers, or general questions on 3D scanning challenges, please feel free to get in touch with us. We're happy to help!
Contact Us →
